
Pricing Page
Use the pricing page to expose your product pricing directly to your customers and allow them to self-checkout.
Setup
Once you've created your bricks, added them to plans within a product you're ready to set up your pricing page.
- Navigate to: Products --> Click on your desired product--> Pricing Page
- Click the edit icon to edit the pricing page details.
- Ensure your logo, product definition, and summary match what you would like displayed on your pricing page.
- Click Edit pricing page
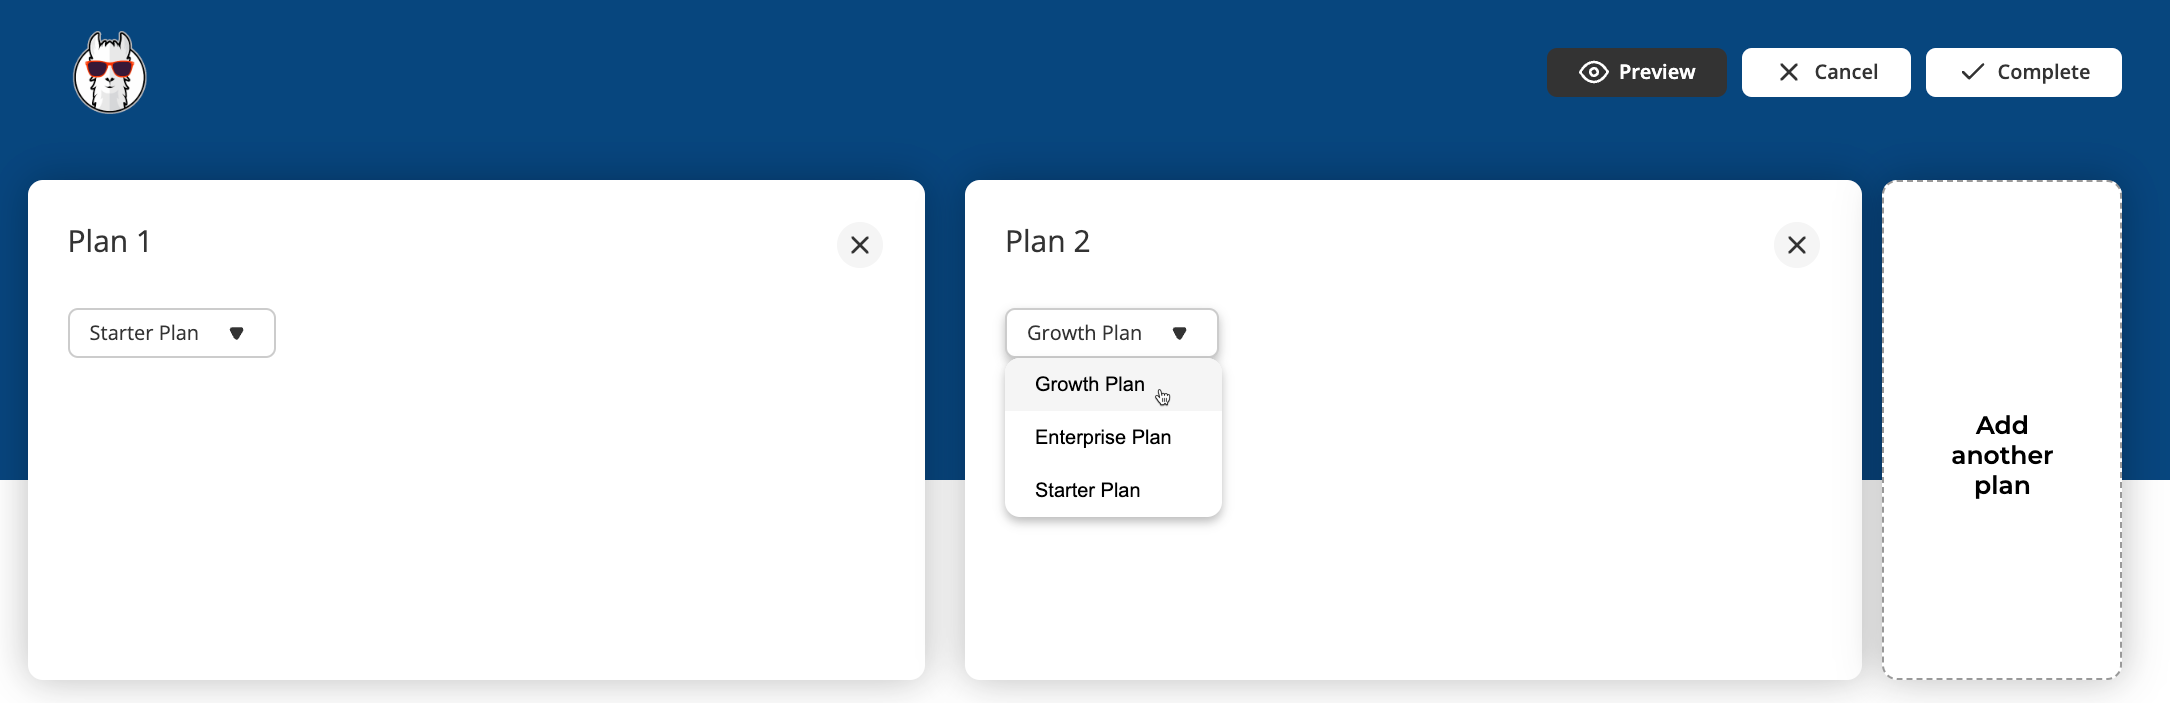
- Select the plans you would like display on your page through the dropdown and click Add another plan if you want to add multiple plans to your page.
- Add features, a description (optional) and check the box for each plan where that feature is available.
- Add FAQs if desired
- When ready, click Preview and ensure everything appears as desired.
- Click Complete
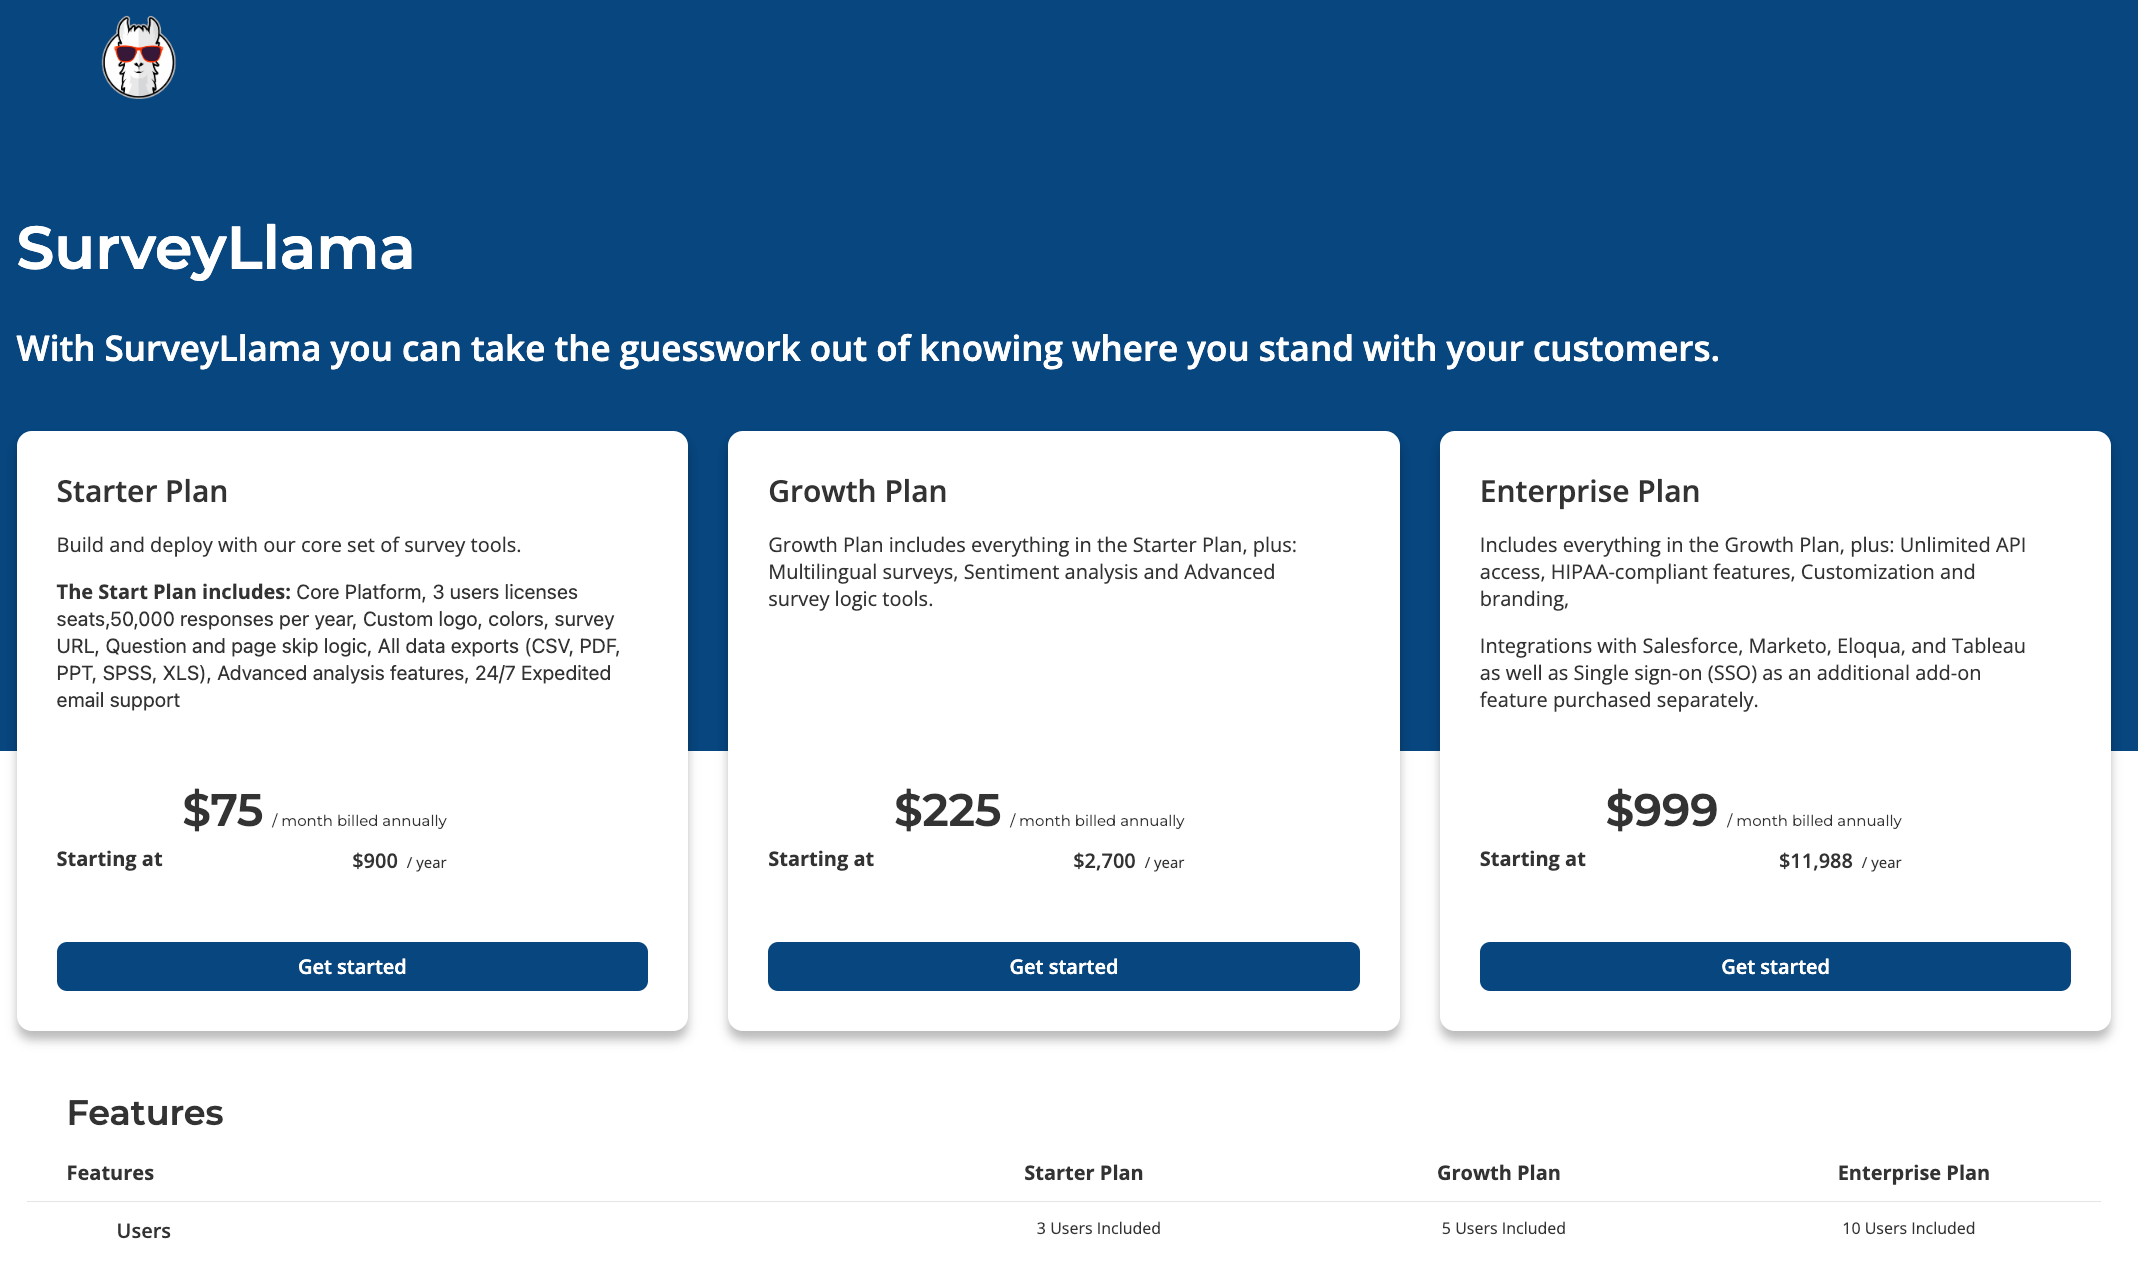
The URL can then be embedded into your company's website allowing your customers to view pricing, select a plan, and checkout.
If you would like to use your own pricing page and have Salesbricks power the checkout after a button is clicked you'll want to us our Magic Links instead of the pricing page. See more on Magic Links here.

This article was brought to you by Jordan Davis, a renowned mason at Salesbricks.
Have questions or need additional support? Shoot me an email at [email protected]
Updated 3 months ago
What’s Next